Getting started
From a fresh install to the first invoice-receipt, step by step. Budget about half an hour, most of it on the provider's side.
Before you start, have at hand:
- a pretix instance (≥ 2024.1) you can install packages into, with Celery workers running;
- a provider account: a Fact.pt API token tied to a series with 8 decimal places, or a Moloni account with a developer app (see each provider's page for what exactly to create there);
- the VAT rate your tickets are sold at, as configured under the event's Settings → Taxes.
1. Install the plugin
Install it into the same Python environment pretix runs from, apply its migration, and restart both the web server and the Celery workers (plugins are only discovered at startup):
pip install pretix-pt-invoicing
python -m pretix migrate
2. Enable it for the event
Open the event's Settings → Plugins, switch to the Integrations tab and press Enable on Portuguese invoicing.
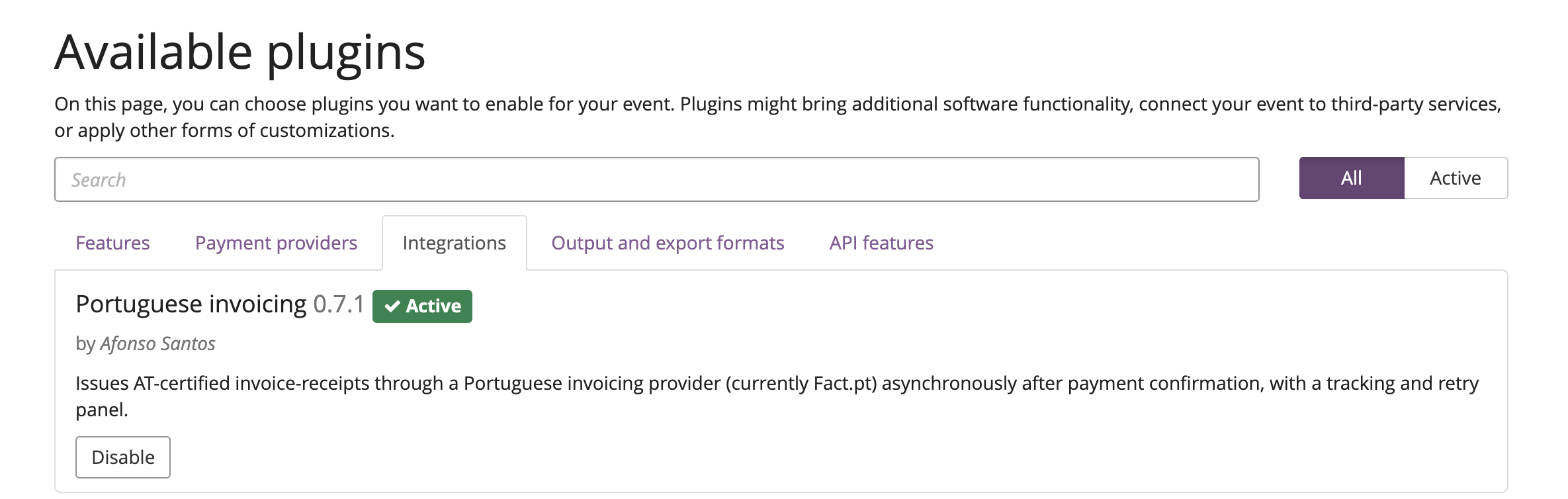
Two new entries appear in the event's sidebar: Settings → Invoicing (PT), where the plugin is configured, and Invoicing (PT) further down, the dashboard of every document issued. Both are labelled "(PT)" to tell them apart from pretix's own "Invoicing" entries, which concern pretix's internal invoices, not these.
3. Pick a provider
Open Settings → Invoicing (PT) and click the card of the provider you'll issue through. Only the selected provider's settings are shown, saved and used.
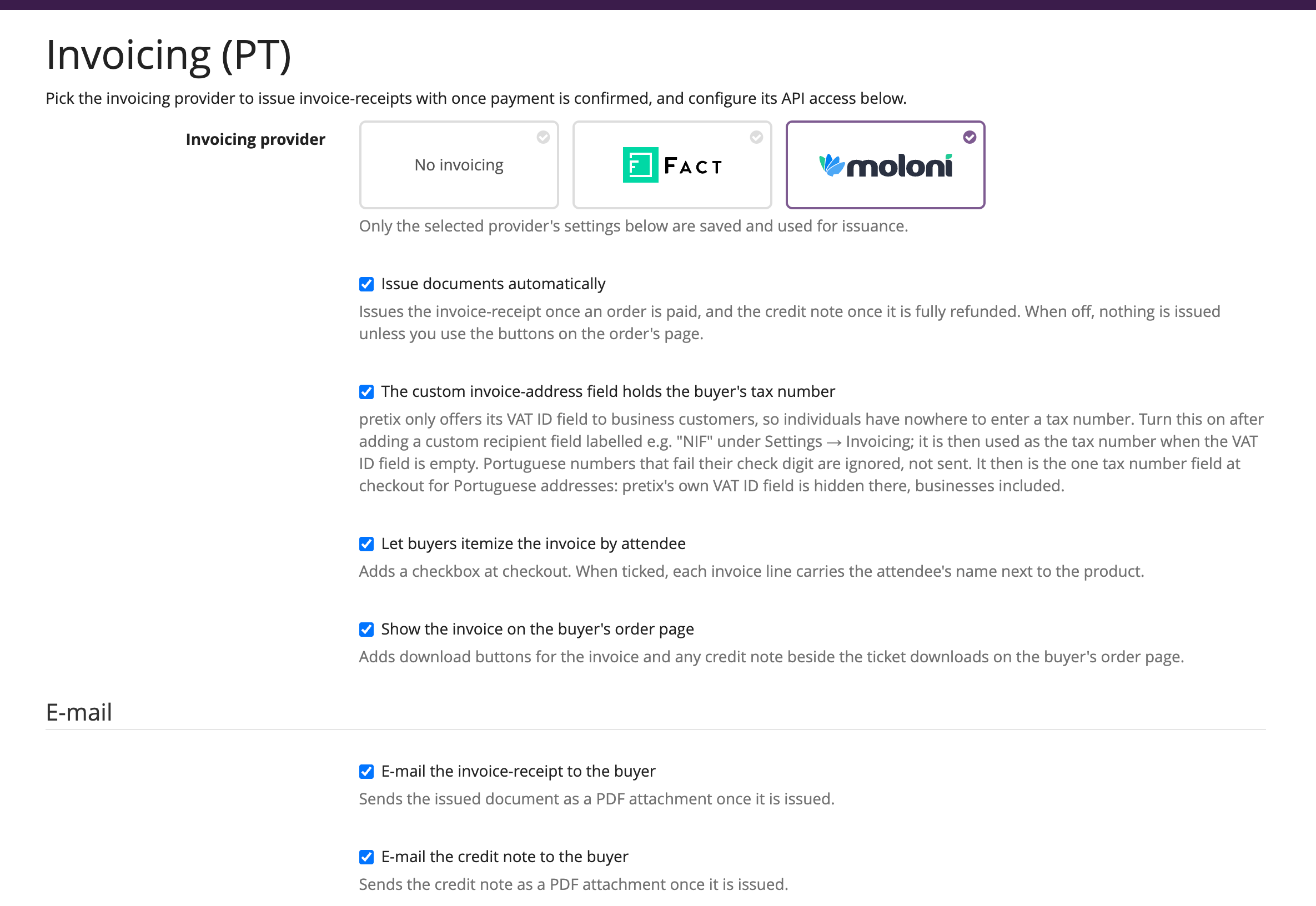
Leave the general options at their defaults for now. They are explained in Configuration; the one you will probably want later is The custom invoice-address field holds the buyer's tax number, set up in step 6.
Not in use yet
Picking a card only shows that provider's settings. Until you press Save with everything the provider needs filled in, a blue notice at the top of its section says Not in use yet, and no document is issued through it.
4. Connect the provider
Fill in the provider's section at the bottom of the same page, then press Save. Each provider has its own walkthrough:
- Setting up Fact.pt: paste the API token, tick Use sandbox environment while testing, pick the VAT rate from the dropdown that appears.
- Setting up Moloni: register the redirect URI in a Moloni developer app, press Connect to Moloni, then pick the company, document series and the rest from the dropdowns.
Dropdowns such as the VAT rate or the company are filled live from your provider account as soon as the credentials you typed are valid, so there is no need to save first to see them. If a field stays a plain number box, the status line under the section says why (bad token, provider unreachable).
5. Match the VAT rate
Both providers receive each line's net price and add their own configured rate on top. The plugin therefore refuses to issue when the provider's rate differs from the rate pretix charged, rather than issue a document for an amount the buyer never paid.
Check that the rate you picked in step 4 is the one on the event's tax rule (Settings → Taxes). An event selling tickets at several rates can't be invoiced yet; see Known limitations.
6. Collect the buyer's NIF
pretix only asks business customers for a VAT ID, so a private buyer has nowhere to type a NIF and would be invoiced as a final consumer. To collect it from everyone:
-
Under pretix's Settings → Invoicing, open the Address form tab and fill in Custom recipient field label with
NIF. Make sure an invoice address is asked for at all (Ask for invoice address).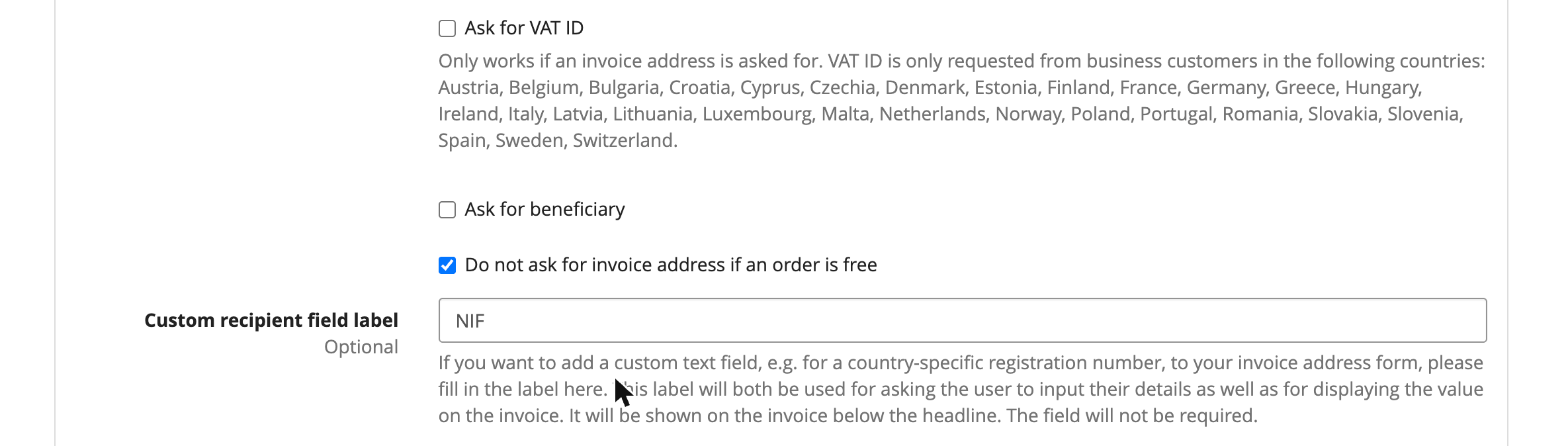
-
Back under Settings → Invoicing (PT), tick The custom invoice-address field holds the buyer's tax number and save.
At checkout the buyer now sees one NIF field in the invoice address form, whether they buy as an individual or as a company. For Portuguese addresses pretix's own VAT ID field is hidden, so there is never a second place to type the number.
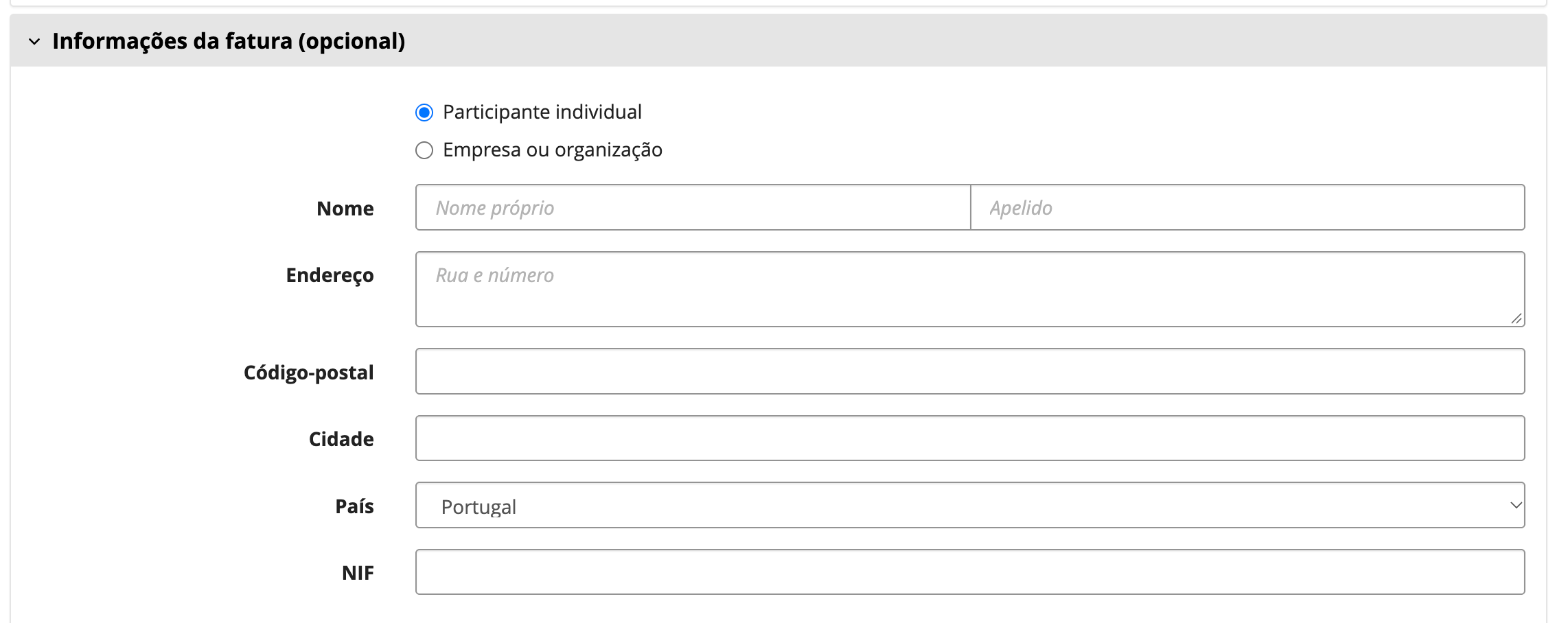
See Tax numbers (NIF) for how the number is validated and what happens without one.
7. Choose what the buyer gets
Still under Settings → Invoicing (PT):
- E-mail the invoice-receipt to the buyer and E-mail the credit note to the buyer send each document as a PDF attachment once it's issued. Both are off by default; pretix's own order e-mails can't carry these documents.
- Show the invoice on the buyer's order page (on by default) adds download buttons beside the ticket downloads.

8. Issue a test document
Keep the event in test mode and the provider in its sandbox (Fact.pt) or a test company (Moloni) for this.
- Buy a ticket in the shop and mark the order as paid in the Control panel, or just mark any existing test order as paid.
-
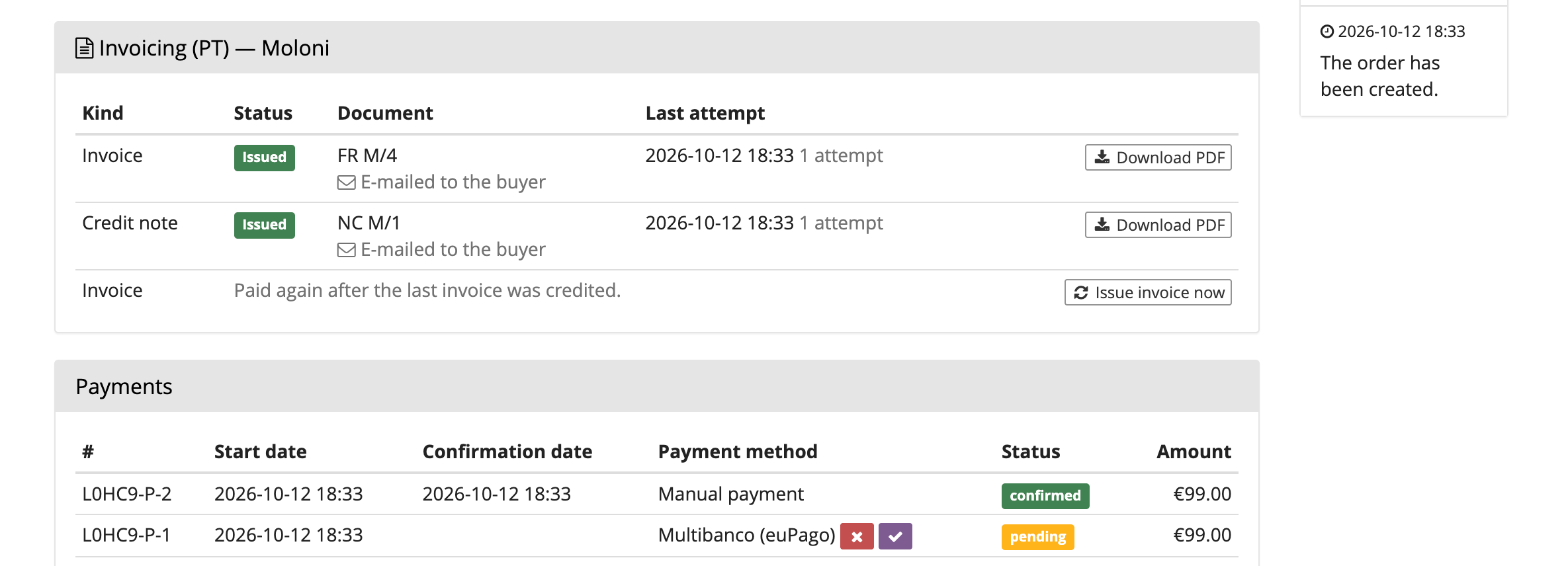
Open the order. Its Invoicing (PT) panel shows the invoice row within a few seconds, with the document number and a Download PDF button.
-
Open the PDF and check the total, the VAT split, and the client (name and NIF). If the order was paid before the plugin was set up, use Issue invoice now in the same panel.
The Invoicing (PT) dashboard in the sidebar lists every document of the event, with its status and any error. Issuing & credit notes explains the rest: credit notes, retries, and what each failure means.
9. Go live
- Fact.pt: paste the production token and untick Use sandbox environment. The tokens are different.
- Moloni: connect to the real company, and pick its real document series.
- Take the event out of test mode.
Before production
Issue a few test documents in the provider's sandbox first and check the amounts, client and tax data on the PDFs. Once issued, a document is reported to the tax authority and can only be cancelled with a credit note.